


Tuesday, March 25, 2014
Slow Cooker Chicken Recipe
Posted by The Stratum On Highland on 12:14 PM
Do you not have enough time to cook dinner every night? It can be hard between classes, athletics, and clubs to eat a balanced meal. However a slow cooker could be the answer. Here is a great recipe for slow cooker chicken. There are also some other great recipes that you can make for the rest of the week. Go to All Recipes for more ideas.
Tuesday, March 18, 2014
5 Hard to Kill Plants
Posted by The Stratum On Highland on 11:02 AM
 Do you have more of a black thumb than a green thumb? Everyone can have plants in their apartment. Here are five great plants that are very hard to kill. They will be beautiful in your apartment this spring. You can learn more at apartment therapy.
1. Snake plant (Sansevieria Trifasciata)
This is my favorite pick for the darker corners of my own apartment. It has a sculptural appearance, adds a bit of green, and seems to thrive on neglect.
This is my favorite pick for the darker corners of my own apartment. It has a sculptural appearance, adds a bit of green, and seems to thrive on neglect.
2. Spider plant (Chlorophytum Comosum)
A popular houseplant when I was growing up, these interesting plants self propagate by sending out off-shoots, do well when their roots are crowded, and can thrive in low light conditions.
A popular houseplant when I was growing up, these interesting plants self propagate by sending out off-shoots, do well when their roots are crowded, and can thrive in low light conditions.
3. ZZ Plant (Zamioculcas zamiifolia)
A hardy plant that can tolerate both low light and watering neglect, the ZZ plant is great for those with a less than green thumb.
A hardy plant that can tolerate both low light and watering neglect, the ZZ plant is great for those with a less than green thumb.
4. Lucky Bamboo (Dracaena Sanderiana)
Adaptable bamboo is a great fit for dim rooms, and is inexpensive and easy to come across.
Adaptable bamboo is a great fit for dim rooms, and is inexpensive and easy to come across.
5. Peace Lilly (Spathiphyllum Wallisii)
Known as a great plant for improving indoor air quality, the Peace Lilly is also one of the few low-light friendly options that produces flowers.
Known as a great plant for improving indoor air quality, the Peace Lilly is also one of the few low-light friendly options that produces flowers.
Tuesday, March 11, 2014
Ace Your Next Test
Posted by The Stratum On Highland on 12:36 PM
Whether you just finished midterms or you still have a few tests to go,
these tips can help you study! Check out these great study tips for
your big tests from cengagebrain. We know you will ace your big tests, and you will have a great break ahead of you!
- Skim: On midterm eve, you may be tempted to open up your chemistry book and read every word of chapters 1-55 (each chapter being approximately 35 pages). Don’t! This is a waste of time. Instead, focus on chapter headings, footnotes, the course syllabus (the subjects listed on here are probably the ones the professor deems most important), study questions, and chapter reviews.
- Don’t cram: On this same note, don’t wait until the night before your exam to begin studying for it. Instead, begin preparing now! A September 6, 2012 article titled “Prepare Not For College Midterm Exams,” posted on SayCampusLife by Matthew C. Keegan offers some great tips on time management so you can get a head start on your upcoming midterms. Setting aside study time, reviewing notes from class, and planning early will help you feel prepared, says Keegan.
- Attend review sessions, study groups: You may be tempted to skip out on that review session or study group being held by your TA, but this could be a huge mistake. Most of the time, these study sessions cover the main exam topics, and TAs usually let more than a few exam questions slip during these meetings.
- Enjoy the silence: If you aren’t attending a study session, find a quiet place where you can stay focused and uninterrupted — the library, an empty classroom, the park. Your dorm room may seem like the most obvious place, but have a plan B ready for when the distractions hit (and they will).
- Disconnect: Facebook, Pintrest, Twitter, and email are all unnecessary distractions, so while studying, disconnect for an hour or so. You may be surprised at how much you can accomplish when technology doesn’t get in the way.
- Figure out what will be on the exam: No, this doesn’t require any mind reading abilities, but it does require you to listen and pay close attention to your professor. A 2010 post by Jeremy S. Hyman and Lynn F. Jacobs for the U.S. News & World Report titled “8 Clues to Figuring Out That College Midterm” offers up ideas such as using old exams to study and giving that review sheet another glance.
- Meet with your professor: Stop by office hours to discuss difficult concepts, ask questions about lecture material, or just to find out what types of topics the midterm will cover. You may be surprised at how much your professor is willing to share.
- Stay healthy: During midterms, it’s easy to overindulge on junk food, up your caffeine intake, and basically suspend all personal hygiene (you won’t be interacting with anyone anyway) — never mind the fact that you have no time to make it to the gym. Don’t fall into this rut. Instead, schedule time for healthy meals and regular exercise, and don’t forget about that shower! You may just find that these breaks help you stay focused.
- Take breaks: Consequently, a 12-hour marathon study session won’t do anything but make you crazy. Instead, take short breaks every hour or so, even if only for 10 minutes. Leave your study area when you do — that bit of fresh air may be just what you needed to clear your head.
- Relaxation, preparation, and time management: It’s finally here! Midterm day! Don’t let all of your hard work go to waste. Instead, check out CollegeAtlas’ post titled “Test Taking Strategies for College Midterms and Finals” (i.e. using the restroom before the exam begins and not spending too much time on a difficult question) to help ensure that you go into your midterm stress free and ready to ace that exam!

Tuesday, March 4, 2014
Dish Washing Tricks
Posted by The Stratum On Highland on 10:33 AM
Are you tired of washing the dishes? There are some great tricks that will help you reduce the amount of time washing. Apartment Therapy
has seven different tips that will cut down the time it takes to finish
the dishes after meals. Keep reading below to learn more!
 1) Start clean. Cleanliness begets cleanliness. Starting with a clean
kitchen motivates you to keep it as clean as possible as you cook. For
example, a clean counter makes your dribbles obvious and helps you wipe
them right away. Also, prevent a backlog by making sure your dish rack
and dishwasher have enough empty space to accommodate new dirty dishes.
1) Start clean. Cleanliness begets cleanliness. Starting with a clean
kitchen motivates you to keep it as clean as possible as you cook. For
example, a clean counter makes your dribbles obvious and helps you wipe
them right away. Also, prevent a backlog by making sure your dish rack
and dishwasher have enough empty space to accommodate new dirty dishes.
2) Don't stack. Stacking dishes almost doubles the amount of surfaces you have to clean. Have everyone clear their own dishes and place them on the counter near the sink or in a soaking tub.
3) Clean as you go. The more you clean as you go, the less you have to clean at the end. Aim for no dirty cooking utensils by the time you begin eating your meal. You'll have enough to clean afterwards.
3) Prepare a soaking station. Although it's best to clean as you go, you can't always clean every single thing as it gets dirty. To corral dirty cooking utensils and keep messes from drying on them, prepare a soapy side of the sink or a tub placed in the sink. Do the same for dirty dishes after the meal. If possible, put dirty dishes in the dishwasher right away, but if you can't, keeping dishes submerged will also prevent caking on of food and save you lots of time scrubbing.
4) Fill pots and pans with water. Again, the idea is to keep food from crusting, which takes significantly more time to clean. While you're eating, fill dirty pots and pans with water so they can soak. Note: Don't put cold water into pots or pans until they've cooled. The sudden change in temperature can warp them.
5) Keep dishes to a minimum. Unless you're entertaining, don't dirty more dishes just for serving. One solution is to serve portions in the kitchen or bring pots and pans to the table. Another solution is to serve from containers that can double as storage for leftovers, such as glass tupperware.
6) Wipe it while it's wet. Swipe counters, appliances, the floor, and the stove when spills are fresh. This will keep your space clean and will keep the mess from spreading (like to the bottom of the spice jars that you place on the counter when you're cooking, for instance). Perhaps most importantly, wiping while it's wet will keep you from having to scrub dried-up messes.
7) Spray and wait. Inevitably, you'll have some spills to clean up. Spraying with your cleaner and giving it some time to soak in a bit before you wipe usually softens the mess and makes it much easier to wipe away.
 1) Start clean. Cleanliness begets cleanliness. Starting with a clean
kitchen motivates you to keep it as clean as possible as you cook. For
example, a clean counter makes your dribbles obvious and helps you wipe
them right away. Also, prevent a backlog by making sure your dish rack
and dishwasher have enough empty space to accommodate new dirty dishes.
1) Start clean. Cleanliness begets cleanliness. Starting with a clean
kitchen motivates you to keep it as clean as possible as you cook. For
example, a clean counter makes your dribbles obvious and helps you wipe
them right away. Also, prevent a backlog by making sure your dish rack
and dishwasher have enough empty space to accommodate new dirty dishes. 2) Don't stack. Stacking dishes almost doubles the amount of surfaces you have to clean. Have everyone clear their own dishes and place them on the counter near the sink or in a soaking tub.
3) Clean as you go. The more you clean as you go, the less you have to clean at the end. Aim for no dirty cooking utensils by the time you begin eating your meal. You'll have enough to clean afterwards.
3) Prepare a soaking station. Although it's best to clean as you go, you can't always clean every single thing as it gets dirty. To corral dirty cooking utensils and keep messes from drying on them, prepare a soapy side of the sink or a tub placed in the sink. Do the same for dirty dishes after the meal. If possible, put dirty dishes in the dishwasher right away, but if you can't, keeping dishes submerged will also prevent caking on of food and save you lots of time scrubbing.
4) Fill pots and pans with water. Again, the idea is to keep food from crusting, which takes significantly more time to clean. While you're eating, fill dirty pots and pans with water so they can soak. Note: Don't put cold water into pots or pans until they've cooled. The sudden change in temperature can warp them.
5) Keep dishes to a minimum. Unless you're entertaining, don't dirty more dishes just for serving. One solution is to serve portions in the kitchen or bring pots and pans to the table. Another solution is to serve from containers that can double as storage for leftovers, such as glass tupperware.
6) Wipe it while it's wet. Swipe counters, appliances, the floor, and the stove when spills are fresh. This will keep your space clean and will keep the mess from spreading (like to the bottom of the spice jars that you place on the counter when you're cooking, for instance). Perhaps most importantly, wiping while it's wet will keep you from having to scrub dried-up messes.
7) Spray and wait. Inevitably, you'll have some spills to clean up. Spraying with your cleaner and giving it some time to soak in a bit before you wipe usually softens the mess and makes it much easier to wipe away.
Tuesday, February 25, 2014
Staying Organized During A Project
Posted by The Stratum On Highland on 9:58 AM
Do you like to craft or take on projects? Cleaning and staying
organized can be the worst part of starting a new craft or project. We
have some tips on how to keep your work station clean and organized
while completing your latest creation. This can make the project less
overwhelming and a more enjoyable experience. You can learn more at apartment therapy.
Start with a clean surface.
Every project will have different requirements. You might need a small table for a quick paper project, or an enormous area to layout quilt pieces — either way it's a good idea to clear off your surface and wipe it down before getting out your supplies. It only takes a minute and ensures you won't set your materials down in a puddle from your water glass, breakfast crumbs, stray threads, or any of the dozens of household perils for craft supplies.
Gather all of your materials and tools before beginning your project.
This is a common cooking tip that applies to crafting as well. By gathering everything together you're checking to be sure you have all of the necessary supplies, and preventing mess-making mid-craft mad shuffles through the bins, baskets, closets and drawers that house your supplies. Now, I will not be so obnoxious as to say that having all of your supplies stored in an organized manner is a tip for staying organized while crafting, but I will say that if the ribbon you need is tucked in a drawer with other ribbons instead of tangled around eight half-wound skeins of yarn studded with hazardous fabric shears and knitting needles, it will be easier to get started on the right foot.
Corral small items.
Anything tiny that comes in multiples should be corralled into bowls or other small containers. Things like beads, sequins, scrapbook eyelets, and screws have a tendency to roll off everywhere and then be impossible to find. I occasionally realize I must have dropped some beads when I hear my vacuum struggling near my project table. Of course, I feel I have to mention glitter. By all means corral it in a container of some kind, but if you're working with glitter my best advice is to learn to love glitter, because you will be living with it until the end of time. I have been married three and a half years and I still find glitter from the place cards at my wedding, and I've moved twice since then!
Place a scrap receptacle right at your feet.
Any sort of basket or bin to drop scraps into as you go will help keep things tidy. I like to put all of my sewing or paper scraps into my bin while I'm crafting, then go through at the end to see if I have any scraps large enough to keep. If you're working with glue, paint, or other messy/sticky items, it's a good idea to have an actual trash can nearby to throw away anything that can't be salvaged.
Clean up immediately upon finishing your project.
This is where I get into trouble. It's important to immediately put away all of your leftover supplies and tools. That way everything is back where it belongs when you want to start your next project. It's amazing how cyclical organization is! Once everything is put away you can wipe down your surfaces again. If anything has spilled, or you've marked your surface, it will never be easier to clean than when it's fresh. You can even take care of a fair amount of the aforementioned glitter mess with a damp towel.
Following these tips should help you have a tidy crafting experience, and set you up to start your next fun project!
Start with a clean surface.
Every project will have different requirements. You might need a small table for a quick paper project, or an enormous area to layout quilt pieces — either way it's a good idea to clear off your surface and wipe it down before getting out your supplies. It only takes a minute and ensures you won't set your materials down in a puddle
 from your water glass, breakfast crumbs, stray threads, or any of the dozens of household perils for craft supplies.
 Gather all of your materials and tools before beginning your project.
This is a common cooking tip that applies to crafting as well. By gathering everything together you're checking to be sure you have all of the necessary supplies, and preventing mess-making mid-craft mad shuffles through the bins, baskets, closets and drawers that house your supplies. Now, I will not be so obnoxious as to say that having all of your supplies stored in an organized manner is a tip for staying organized while crafting, but I will say that if the ribbon you need is tucked in a drawer with other ribbons instead of tangled around eight half-wound skeins of yarn studded with hazardous fabric shears and knitting needles, it will be easier to get started on the right foot.
Corral small items.
Anything tiny that comes in multiples should be corralled into bowls or other small containers. Things like beads, sequins, scrapbook eyelets, and screws have a tendency to roll off everywhere and then be impossible to find. I occasionally realize I must have dropped some beads when I hear my vacuum struggling near my project table. Of course, I feel I have to mention glitter. By all means corral it in a container of some kind, but if you're working with glitter my best advice is to learn to love glitter, because you will be living with it until the end of time. I have been married three and a half years and I still find glitter from the place cards at my wedding, and I've moved twice since then!
Place a scrap receptacle right at your feet.
Any sort of basket or bin to drop scraps into as you go will help keep things tidy. I like to put all of my sewing or paper scraps into my bin while I'm crafting, then go through at the end to see if I have any scraps large enough to keep. If you're working with glue, paint, or other messy/sticky items, it's a good idea to have an actual trash can nearby to throw away anything that can't be salvaged.
Clean up immediately upon finishing your project.
This is where I get into trouble. It's important to immediately put away all of your leftover supplies and tools. That way everything is back where it belongs when you want to start your next project. It's amazing how cyclical organization is! Once everything is put away you can wipe down your surfaces again. If anything has spilled, or you've marked your surface, it will never be easier to clean than when it's fresh. You can even take care of a fair amount of the aforementioned glitter mess with a damp towel.
Following these tips should help you have a tidy crafting experience, and set you up to start your next fun project!
Tuesday, February 18, 2014
Avoid the Flu
Posted by The Stratum On Highland on 10:33 AM
Are you trying to avoid getting the flu? There are certain items that are more susceptible to carrying germs than others. This blog will explain five things that you absolutely must clean to help avoid the flu. You can learn more at apartment therapy.
Remember the 60 Minutes special from years ago which revealed that television remotes are the most germ infested item in a hotel room? Yeah, same goes for the home remote. With so many hands touching it, sitting on it and never cleaning it — the remote is one you absolutely can't miss.
Here are a few other items you've probably missed over the years that you might want to try giving a quick wipe down:
Remember the 60 Minutes special from years ago which revealed that television remotes are the most germ infested item in a hotel room? Yeah, same goes for the home remote. With so many hands touching it, sitting on it and never cleaning it — the remote is one you absolutely can't miss.
Here are a few other items you've probably missed over the years that you might want to try giving a quick wipe down:
- The computer mouse
- Video game controllers
- Smartphones
- The computer keyboard
- Tablet devices and eReaders

Monday, February 10, 2014
DIY V-day Gifts
Posted by The Stratum On Highland on 10:34 AM
Are you looking for a gift for your special guy this Friday? These are some great DIY gifts that will not break the bank. Keep reading and you can learn more here.
1. DIY Sharpie Mug - For the always-working-late, coffee-obsessed guy
Want him to stay sharp in the morning? Make your own coffee mug by drawing or writing some personal messages on it with a Sharpie marker. It's an easy, tailored gift that he can actually use. You can buy your own mug and Sharpie or get a DIY mug gift package at Starbucks. Here's a YouTube tutorial:
2. DIY Skinny Tie - For the business-first, suit-up-like-Barney-Stinson guy
Suit up!
DIY MEN'S SKINNY TIE
3. DIY Meal - For the food-loving, on-a-budget guy
 The first thing everyone thinks of when it comes to
Valentine's Day is having a good meal at a nice restaurant, which is
usually expensive. Instead, why not buy a couple of candles and
placemats and cook him a meal instead? Dinner can be just as nice at
home, especially if you cook his favorite dishes. Here's a link to some
Valentine's Day recipes, but there are thousands of other ideas out
there for making a special V-Day feast.
The first thing everyone thinks of when it comes to
Valentine's Day is having a good meal at a nice restaurant, which is
usually expensive. Instead, why not buy a couple of candles and
placemats and cook him a meal instead? Dinner can be just as nice at
home, especially if you cook his favorite dishes. Here's a link to some
Valentine's Day recipes, but there are thousands of other ideas out
there for making a special V-Day feast.20 LOVEY DOVEY DINNERS
One for you and one for him.
 Many people have Macbooks and iPads these days, but you can make his
stand out with a personalized laptop or iPad sleeve. Be creative by
adding things that only you two would understand. From leather to tweed
cases, here are 20 simple tutorials on making a laptop or iPad sleeve
just for you and yours.
Many people have Macbooks and iPads these days, but you can make his
stand out with a personalized laptop or iPad sleeve. Be creative by
adding things that only you two would understand. From leather to tweed
cases, here are 20 simple tutorials on making a laptop or iPad sleeve
just for you and yours. 20 DIY LAPTOP/IPAD SLEEV PROJECTS
5. DIY Kiss Flip book - For the romantic, photo-loving guy
Time to go old-school this time
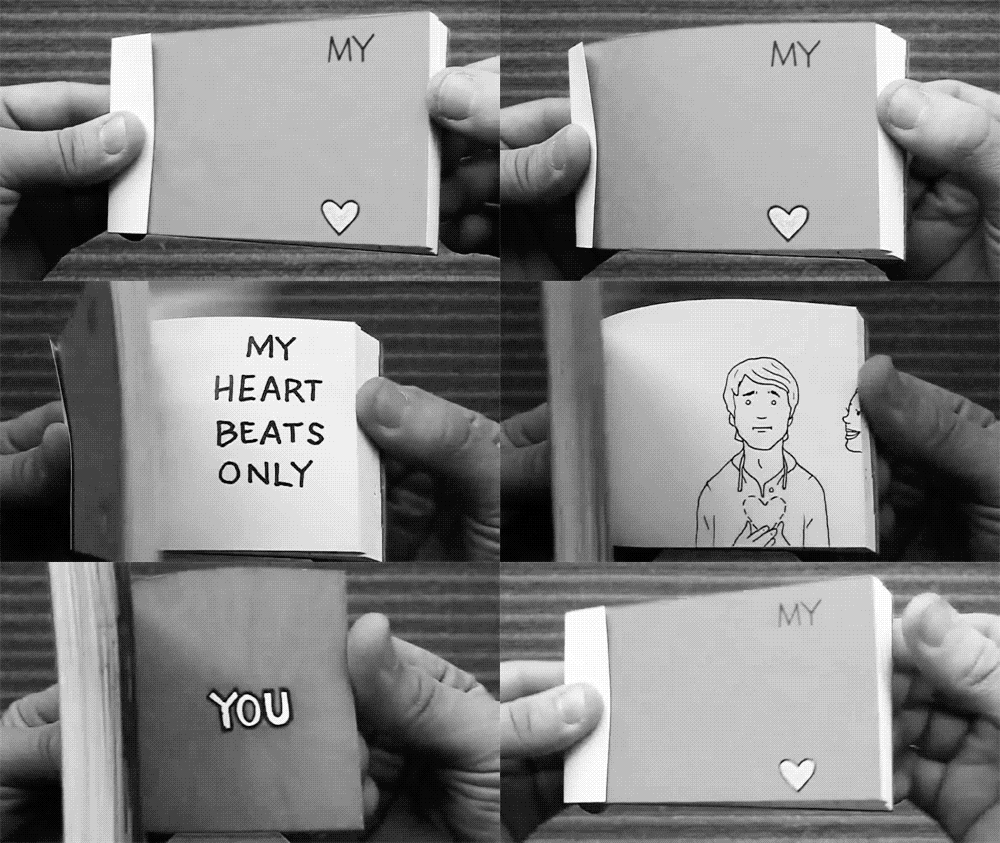 Whether he's a hopeless romantic or a down-to-earth practical kind of
guy, he will definitely appreciate this cute little idea. Between
Facebook, Twitter, Instagram and Vine, you can easily find photos and
videos of your other half, but this old-school method of stop-motion
will create a more touching action sequence than any app could. Here's
an easy tutorial on making a Kiss Flip book, which you can customize to
your liking.
Whether he's a hopeless romantic or a down-to-earth practical kind of
guy, he will definitely appreciate this cute little idea. Between
Facebook, Twitter, Instagram and Vine, you can easily find photos and
videos of your other half, but this old-school method of stop-motion
will create a more touching action sequence than any app could. Here's
an easy tutorial on making a Kiss Flip book, which you can customize to
your liking.


